
I’m offering this tutorial for free. That doesn’t mean you can do whatever you want with it. But, I’m pretty easy going. So, you pretty much can :p Check the Creative Commons Attribution-Noncommercial 2.5 Canada. Basic rundown:
– Feel free to share. Distribute. Tell people about it. Change anything you want in it. However, make sure people know that it’s my original work. And don’t use it to make money. That includes using it to teach classes. If you do want to use it for a class of any sort, let me know. Preferably ask, not tell. We can probably work something out :D

Or small project holder. I’ve made mine big enough for a mitten-in-progress, camera, wallet and various other purse and knitting knick-knacks. I also took 51 pictures of it’s creation. Most of them are pretty crappy. Anyways, here is a visual walk-through in creating a woven duct tape thingie.
Supplies:
1 roll Duck brand tape in Main Color (black)
1 roll Duck brand tape in Contrast Color (pink)
1 roll Duck brand tape in Contrast Color 2 (green) (optional)
Unloved scissors (Don’t use ones you like; They’ll get tape-y and sticky)
Large stick resistant surface
Large Velco square
Ruler
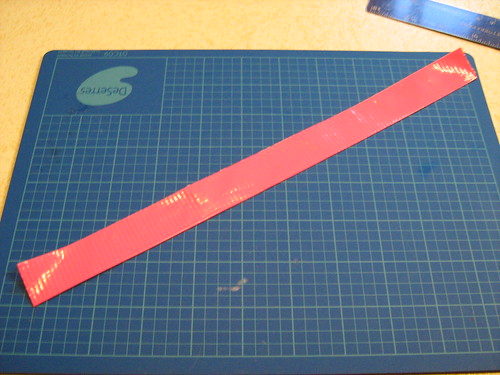
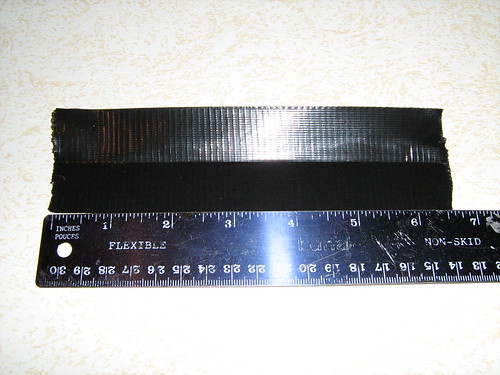
Step 1: Make the horizontal strips
Measure out 12 inches of your contrast color. Fold it in half length wise.

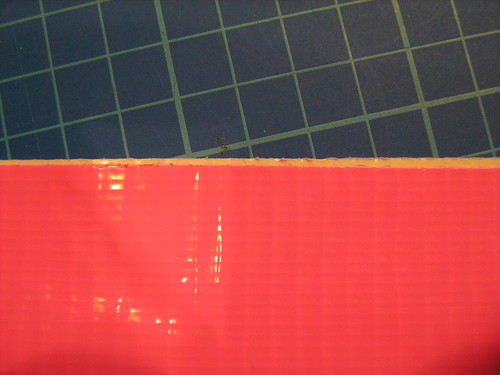
Try to avoid doing this: That little bit of white there is sticky and not very pretty. But, don’t stress too much about it if it does happen.
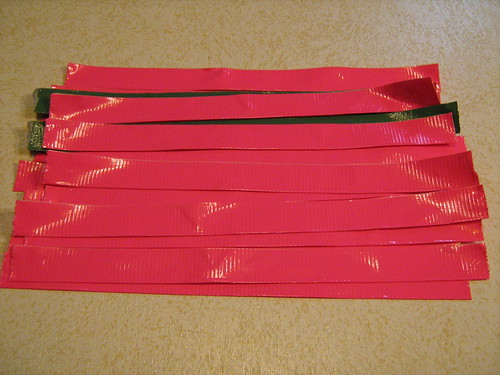
Repeat 23 times. Yep, I said 23. Do a couple in CC2, if you want to shake things up a bit. Neatly line them up and toss a few textbooks on them to flatten them out. Leave the textbooks on for at least as long as it takes to do step 2.

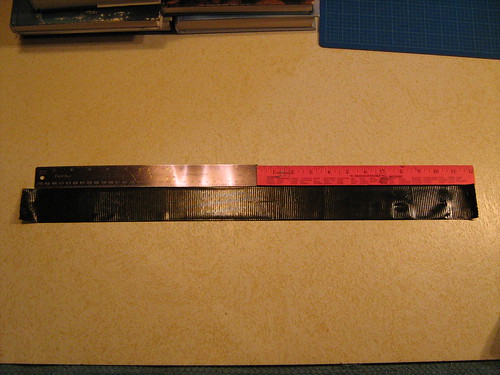
Step 2: Make the vertical strips
Measure out 25 inches of MC. Fold that in half. Not too easy . . . but you only have to do it 12 times.
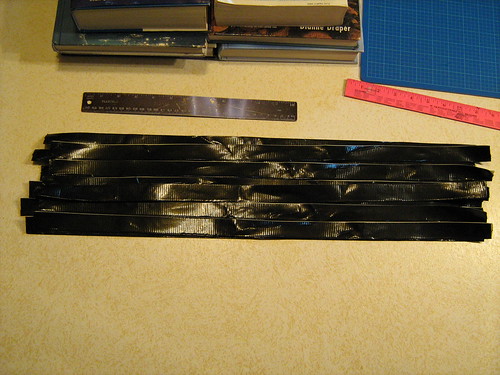
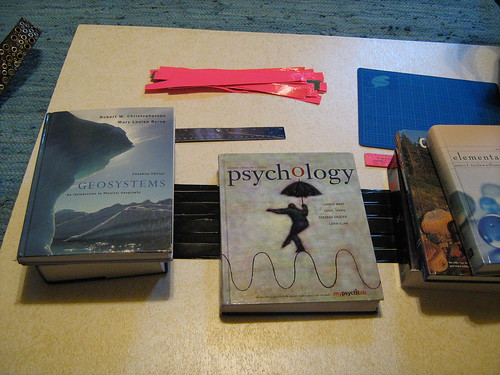
Cover at least the ends with a few textbooks for a while. I knew that psychology one would come in handy some day.
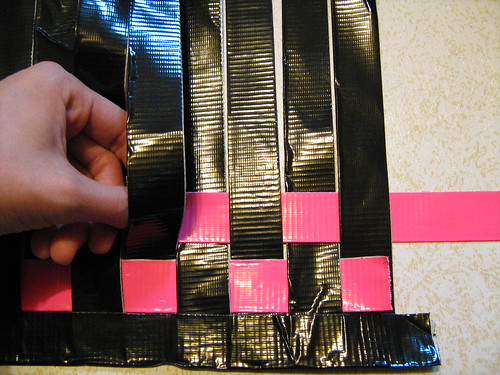
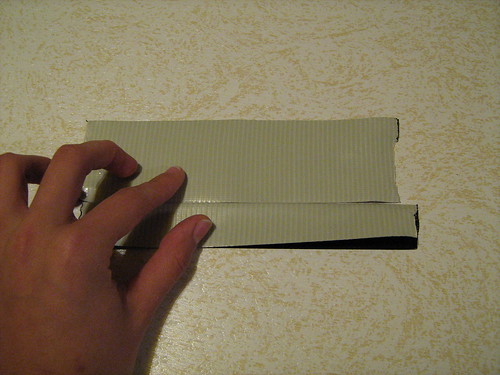
Step 3: Weave them together and line the purse
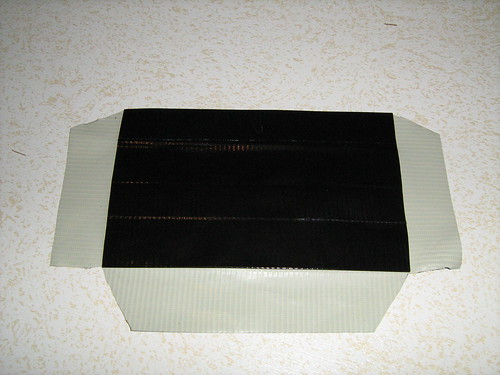
Once you figure they’ve flattened out, rip off a piece of MC about 14 inches long. Fold it in half, sticky side OUT to make a crease. Line all 12 of the long MC strips along the crease, all close and snuggly-like. Fold along the crease over the ends.
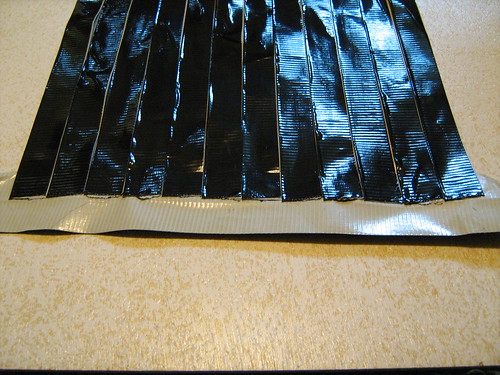

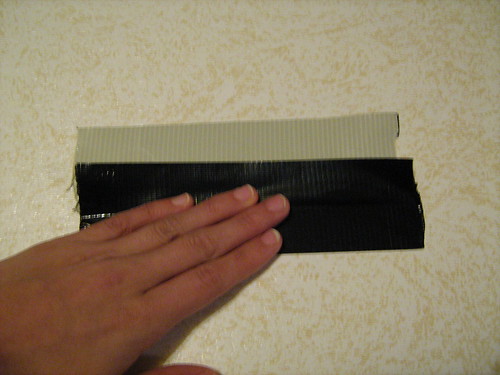
Then, using strips of CC, start weaving. Over one, under one, over one, under one . . .


All the way to the end.
Then, grab another strip and do it again. Except, this time start under one, then go over one, under one, over one, you get the drift. Throw in some CC2 if you want.
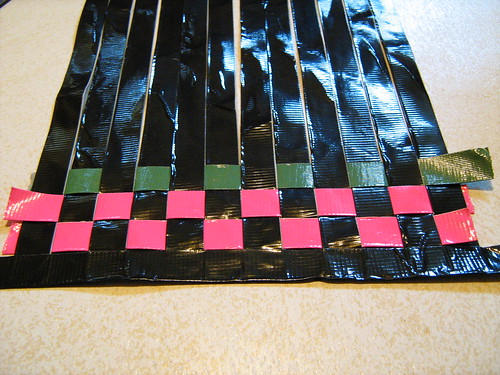
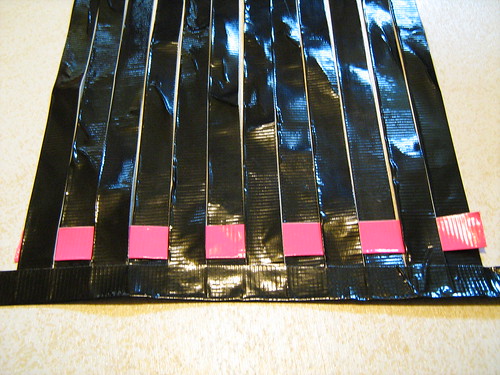
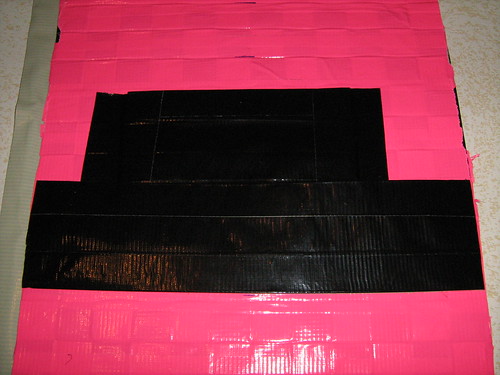
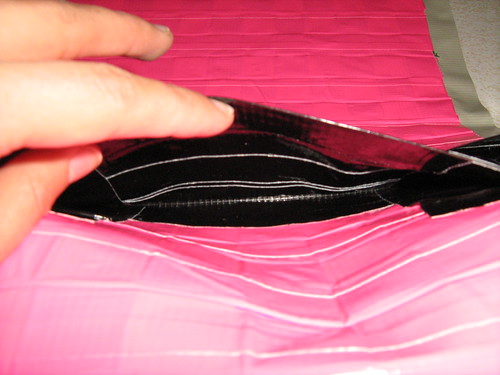
Every few strips or so, cover what you have done with a 12 inch strip of CC. Don’t worry, the weaving is still visible from the other side. This just acts as a liner for the inside, so things don’t poke out.

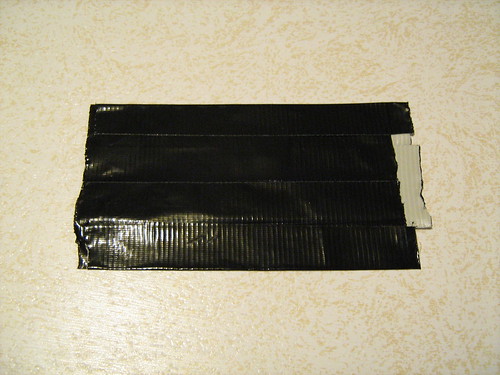
You should end up with something like this:
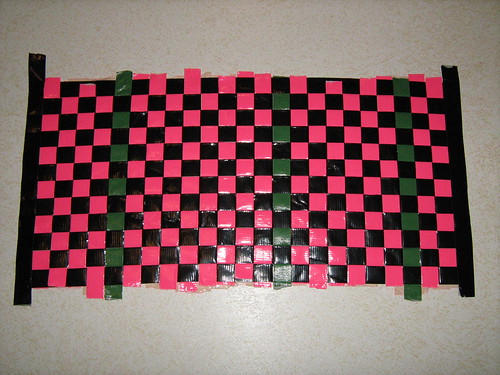

Yay! The basics of the purse are done! Now on to the fiddly stuff . . .
Step 4: (Optional) Inner Pocket
Measure out a strip 6 or so inches long. Fold it in half STICKY SIDE OUT . . . and lay another 6 inch strip touching the upper, sticky edge, sticky side up.
Unfold the bottom piece so that the two pieces are totally stuck together. Fold the top sticky part over the middle, so that there is only sticky on the bottom edge.
Flip it over, take another 6 inch piece of tape and cover that sticky edge, without covering any black. That way, the sticky edge continues. I’m losing you aren’t I? Basically, you halfway overlap pieces of tape, flip it, halfway over lap again and repeat until it is the size you want.
Then, with the last one, you fold it down so you have a sheet with no sticky band at the top or bottom.

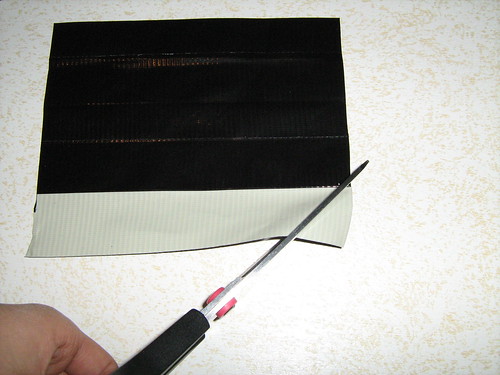
Then, you add a sticky band to the bottom. Take a 6 inch piece and put it half on, half off the bottom of your little square. Trim it to an angle. CUT WITH THE STICKY SIDE OF TAPE UP. THIS WILL MAKE IT EASIER TO CUT AND LEAVE LESS RESIDUE ON YOUR SCISSORS. Don’t know why, but it works.

Add angled bands to the two sides, too. Flip over, and fold these edges in half onto each other.
Ending up with this almost envelope-like thing. Stick that onto the inner liner.
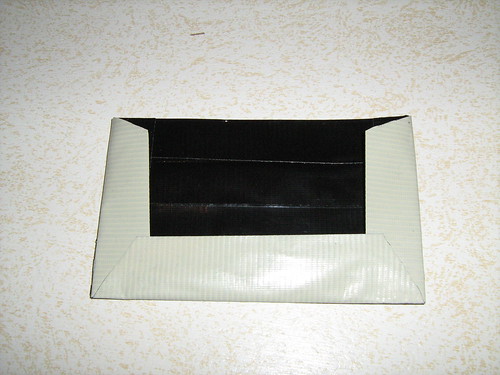
The envelope edges make it stick from the inside. Tack it down with some strips on the outside of the pocket, too, or it’ll end up falling off eventually.
I added a longer one in, too. I nestled the little pocket into the big one for no real reason. You can see in this picture how I added some tape on the outside part to stop the pocket from pulling off.
Step 5: Tidy up the purse before construction
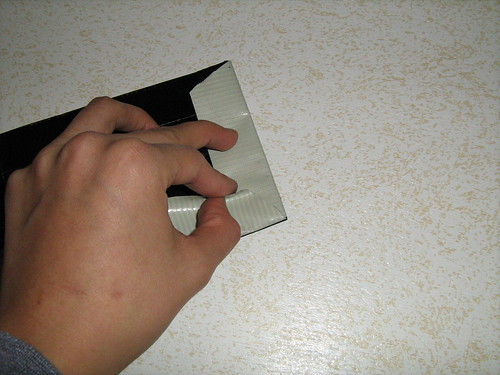
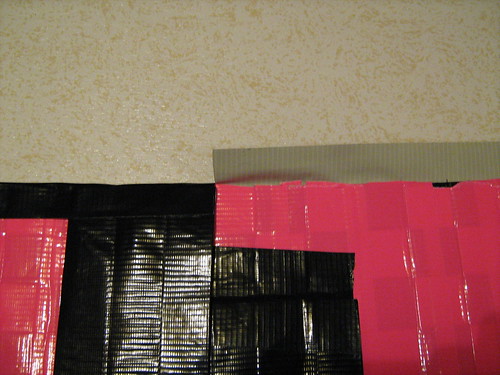
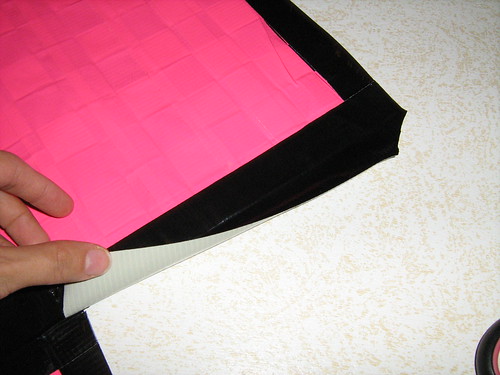
Add a long MC strip along the longest edge, leaving half of the strip hanging off the edge. Flip the entire thing over, and fold the hanging edge over the inside of the bag.


If you have a pocket near the edge, like I do, cut the strip so that the pocket can still open. Continue folding after the cut.
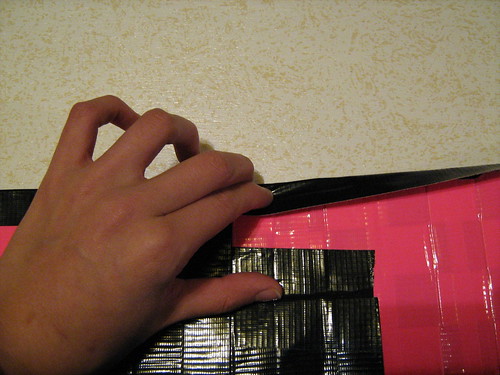
Repeat for the other unfinished edge.
Step 6: Make the sides of the bag
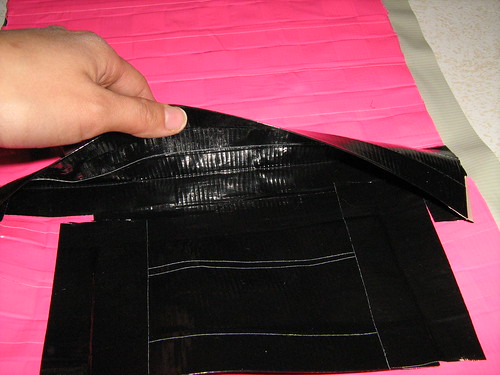
The same way you (might) have made the pockets, make a long sheet, at least 8 inches tall and 4 inches wide.

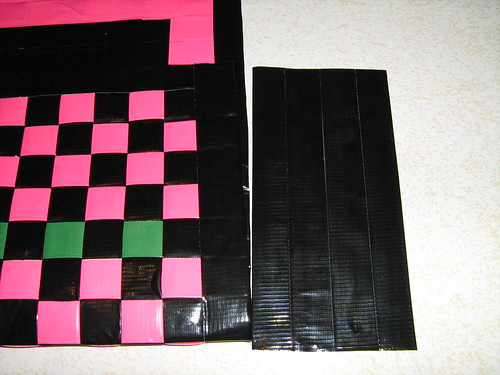
Trim down the edges, and make it so that it is about 4 inches on the bottom, and 2 inches at the top. Like a wanna-be triangle.
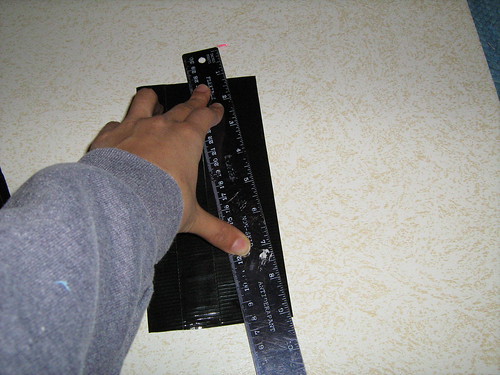
On the outside, count down 8 strips. Tape the almost-triangle thing to the next for strips on the inside.
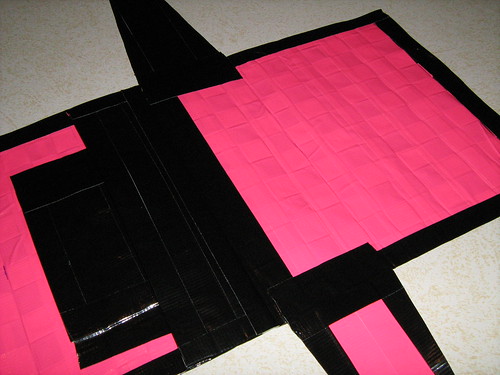
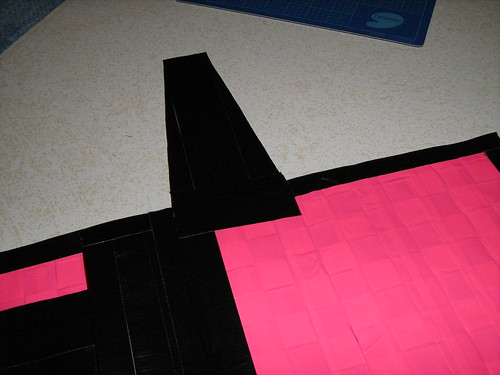
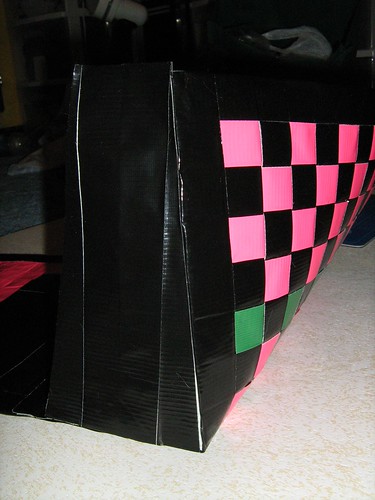
Put a strip halfway hanging off the 8 strips that you counted, so that it is touching the bottom of the almost-triangle and the top corner. Fold it in half sticky side out. MacGyver this sticky piece up the side of the triangle.
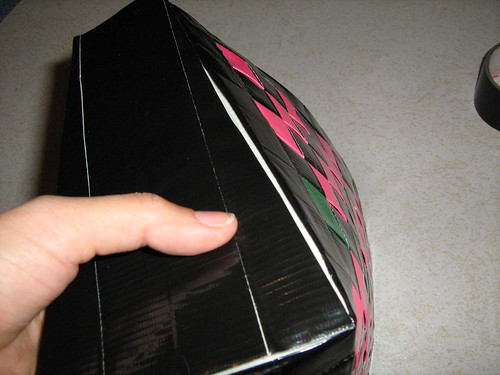
Repeat on all 3 other edges. The other side will be too long. That’s cause it is a flap-top! Just connect it as far as it will go. Cover all the edges with a strip of MC on the outside to hide the sticky white stuff.
Step 7: Make the handle
Cut 3 strips as long as you can stand, or a bit longer than half of the length you want the handle to be. Lay one down, sticky side up. Cove half of it with another strip, sticky side down. Fold one half over the other. Flip the piece and cover the now-exposed sticky edge half way with the third sticky piece. Flip over again and fold the edge down so there are no exposed edges.


Repeat! Tape these two pieces together, tape them to the inside of the bag. Attach velcro squares to center of the overhanging flap, and matching on on purse front, ant voila!
Le bag!


Just made this purse it turned out great(:
Awesome design thank you! i love mine!
Thank you so much for posting!!! When I made it and brought it to school everyone was asking me for one. I was the envy of all my friends :D
I loved making this bag. I do suggest to braid the handle and attaching it for a stronger hold. Also a tip for sticky scissors… use a Magic Eraser from Mr. Clean. Totally takes it off real quick and you can use your fav scissors! :) Thanks for the pictures, and no, they aren’t crap, they’re really good :)
This bag is really cute. I make other duct tape crafts if you are interested in seeing some. My website is http://www.graceswallets.weebly.com Thanks!!!
This is a great bag, made some minor tweaks but nothing major, you are bright ;)
Pingback: How to Make a Duct Tape Purse
Thanks A Bunch! This purse is soo cute. I can’t wait to get started!
Thanks a bunch. This purse looks so fun to make. I can’t wait to get started!
This thing took me a good 6 hours to make put it turned out great! All my friends want me to make them one too Haha hopefully I can sell it for a decent ammount of $$$$$ at my next craft show :)
Thank you so much! I love crafty projects and this one was genius. Thanks for this guide and for making it available for free. Here’s a pic of mine! :D http://yfrog.com/h3y9npmj
I have never made anything like this before but I want to try for Christmas presents. I was wondering how much weight these can hold. Do you have to be gentle with what you put in them or are they pretty durable. Also I would like to make one larger than what you have on here so could I just double all the measurements or will this only work with what you have planned out? Thank you so much! I am so excited to get started!
Thank you so much!!! i made this today and it turned out beautiful! i can’t believe that duct tape can look this good!
LOVE the purse its SO cute.It took FOREVER tho but it was worth it!!! :D
Hey, if your scissors ARE all sticky and nasty, just take a paper towel, put rubbing alcohol on a certain spot, and rub on the sides of the scissors which have gunk. I have a pair I use for all my duct tape projects and I just clean them afterwards.
I’m confused on making the sides of the bag…can anyone help?
hey Don’t know if you’d get this but. what i did was cut 3 Pieces of my MC(main Color) 12 inches long, I then put 3, 12 inches of Gray Duct tape on Back. i then did the same thing over again so you have Two 5 inches wide and 12 Inches long.i this Cut the End of Both to make It into a Trangle but you really don’t have to. I then Took the Length of my Bag, and Minsed how long the Trangle Section was. Then i taped It in the Middle of Each Sides and Then Taped It on the INSIDE first with Gray duct tape. Then i Did The OUTSIDE with My MC!! Hope that Helps
i genuinely enjoy your posting type, very attractive,
don’t give up and keep creating simply because it simply that is worth to read it,
impatient to view much more of your own writing, have a great day :)
I put a bow on the flap of the one i made and it is so durn cute
thanx
reccomended websites?
do u recommend any other websites?
I spent today working on this purse. I LOVE IT!!!! I added some plastic flowers in the corner. I am going to use it to carry my teacher’s supplies to and from school. Thank You, Robin
This purse is amazing! One of my friends made one and gave it to me for my birthday! I love it! =]
I made one similar to this a few years back for a 4-H project. Mine used full strips of tape instead of being folded in half. It was so much fun to make, also pretty challenging. I put a magnetic purse snap in the middle of the flap instead of velcro and it has a zipper pocket on the inside. I think I’m going to make one like yours now. It’s so great you put this online, my grandmother and I made one up for mine. Thank you for posting this!
Wow! I loved it! It turned out so cute. I made a bag that didn’t have a flap at the top. thanks for posting this :) I coudn’t find ANY other website so thanks again loved it :)
thanx so much i just made one ita ao cute thanx so much!!!!!!
Thank you for the “How To” This was a great Sunday afternoon project. I made this for a friend I work with for her B-day. I plan on making one for me next! Take care and thanks again.
omg i made this bag to use for school and it is so cute ive seen these in stores for up to 50 bucks!!!!!!!!!!
Coolest one I’ve seen. :)
I’m gonna use this way when I make mine. :)
I just got into making duct tape stuff. And I wanted to make this bake and i just went out to buy duct tape and was wondering how many rolls i needed so please reply with an answer
It said 3 rolls. 1 roll Main Color, 1 roll Cantrast color, 1 roll contrast color 2.
sooooooo cute i going to make!!!! ……………..:)
I absolutely loved this! I have it mostly done but have to wait to finish it, I ran out of duct tape due to some mistakes. The only thing I really changed is mine isn’t going to have a flap, I’m getting the actual purse snaps and putting them in there.
Lovely design! Have friends in this week from far away–we’re opting to make purses tonight instead of playing cards. It’s the next-generation sewing circle! :)
Thank you for taking time to share your ideas, and for the pictures (which are pretty NOT crappy!)
Awesome purse! Its funny i made one just like that last week and thought i was unique… Check it out here http://craftdgirl.wordpress.com/
That’s great you made a step by step walkthrough with picts. I was too lazy to do that…
-craftdgirl
Hey, we loved making this purse with our 9 year old daughter. It came out great! I do have two quick questions, though:
1) The instructions say to create two straps & tape them together. How? On top of each other? How do you attach them together?
2) Will taping the straps to the inside of the purse create a strong enough attachment to keep the bag from detaching from the strap? Any specific instructions on how to tape the strap in?
Thanks!
— Ben
Was i the only one that it took a long time to make? Estimated around 4 hours.
4 days for me about 3-5 hours each. i went slow and ran out of duct tape at one point
I love this! Just finished my first try up today and love the look. Had to make a few modifications due to not measuring everything. lol But I love it. My bestie wants me to make one for her! haha Thanks for the instructions!
does anybody know what the dimensions of this bag are? i have an issue with having hugenormous bags because i feel the need to carry EVERYTHING around and while i LOVE LOVE LOVE this bag i would like to know how big it is……oh well, i may just have to start on it…..
oh my gosh!!!this is the cutest purse ever!!! i really needed a purse. and this one is so useful!! i can put pretty much everything in there!!i love it!!
Nice woven purse. I’m a teacher from Indonesia and you gave me inspiration about my next teaching material. The girls will love it. Thank you.
oh my goodness they are selling duck tape purses and wallets and all kinds here….oh goodness what are we to do….Allyssa…dont worry about these others who think they are high and mighty…make it and enter the contest and have fun… Life is about learning and trying and having fun and if we didnt copy each other then no one would learn….EVERYTHING we use and do if copied from someone else…EVERYTHING!!!!!! Well Merry Christmas Y’all
http://www.ducttapefashion.com/products/prod01.htm
I made one for my wife and she loves it! Thanks for the “How To”!
Hi!
My name is Jessika!
thanks alot! i was so bored of the wallets, ties and so on and it was nice to get away from the norm. i made a great looking goth, punk school bag by just tweaking the pattern a little and increasing the size and it looks awesome!
That is SSOOO cool i couldnt figure out how to make a pocket on the inside neatly, but u showed me! Thanks!!
I just got done with this purse! It was hard…but worth it! The directions where awesome! It took me prob 3 hours. But it looks so cool! Thank you so much!
Kayleigh
this is great!! thank you sooo much for posting the tutorial! i just started duct tape projects and i wanted to make a purse JUST LIKE THIS! i wasn’t sure how to go about making it and actually making it look good!
THANKS A BUNCH!
i love this purse to death! i’ve got to make it sometime soon!
In response to Alyssa’s post…Good luck on your project. Please don’t contact any chef or bakers for recipes & techniques if you plan on entering the baking or cooking portion of the fair. After all, using a recipe or instructions must be cheating somehow. It seems that this website has a very “unique product” that no one else ever thought of. how dare all those other duct tape purse websites copy this idea.
Pingback: Cabling and Duct Tape « Wiznerd Extraordinaire
Hey, Alyssa never said she was going to use this pattern. and it is a wonderful purse! but sure if she does use it, she will definitely make it her own! oh and Alyssa what ever you decide to do…GOOD LUCK!
Teenage DD and friends love making things with duct tape. Will have to show them this!!
That’s spectacular! That’s all I’m gonna say. :o)
Well, besides that it’s so nice that you posted the tutorial.
Super cute purse!!
Alyssa, it seems a bit rude to use someone else’s pattern in a contest without even asking them. Asking them to make modifications for you is even worse! Contests are supposed to be about how well you can do something, not how well you copy someone else’s work.
Thanks for posting this pattern…i’m making a purse to enter in the CA State Fair! It’s so cute! I have a question…is there a way to make the purse NOT a flap top?
Thank you so much for this pattern. I made it late at night, so it was getting harder and harder to follow the instructions after the weaving.. But I managed, and I love it. It’s my new purse, complete with my own duct tape wallet and iPod case.
Thanks! :)
Loved making this bag! I made it for my knitting projects, and also made a small little wallet-like thing for my dpn’s, scissors, etc. Thanks for posting it!