
Want to print? Here’s a PDF Download. Want to know what you are allowed to do with it? Check the Creative Commons Attribution-Noncommercial 2.5 Canada. Basic rundown:
– Feel free to share. Distribute. Tell people about it. Change anything you want in it. But, don’t get rid of the blog link/by line/attribution in the PDF. And don’t use it to make money. That includes using it to teach classes. If you do want to use it for a class of any sort, let me know. Preferable ask, not tell. We can probably work something out :D
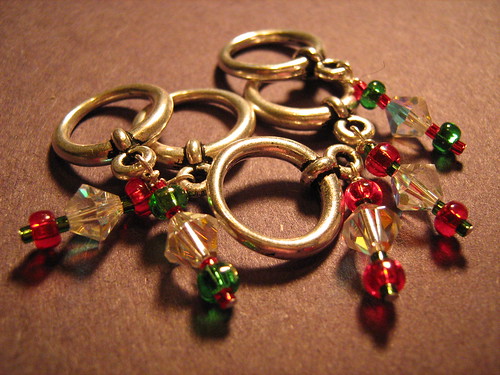
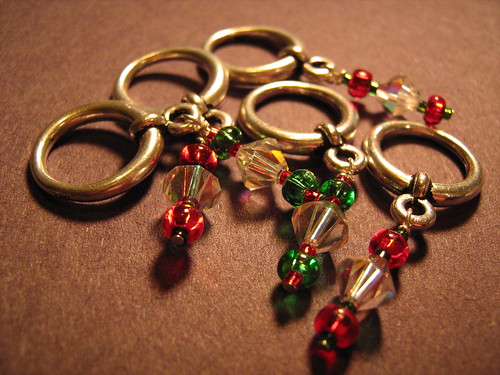
I like making stitch markers. So, today, I made some Christmas-y ones! And then, because I feel there is a void in the stitch marker tutorial section of the internet, I made one myself! (That and I have a photography addiction. Just a heads up–I’m probably not going to be posting many pictures between now and the end of the month. Having finally worked my way through the bandwidth of my 5th Flickr account, I’m banning myself from another . . . then again, I’ve still got my Photobucket . . . ) Anyways, here they be:
Supplies:
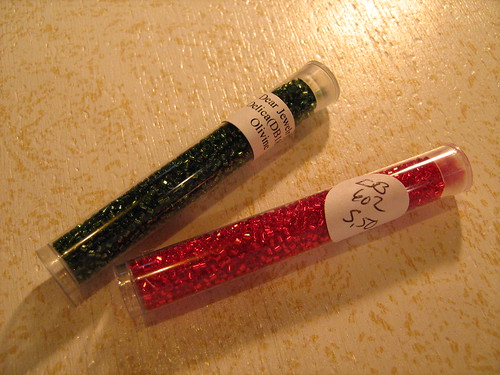
– Big-ish beads

– Smaller beads (with a really small center hole)
(Size comparison pic)

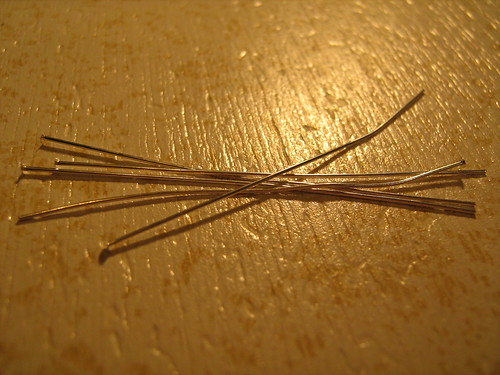
– Head Pins (Thanks for the proper name, chemgrrl!)
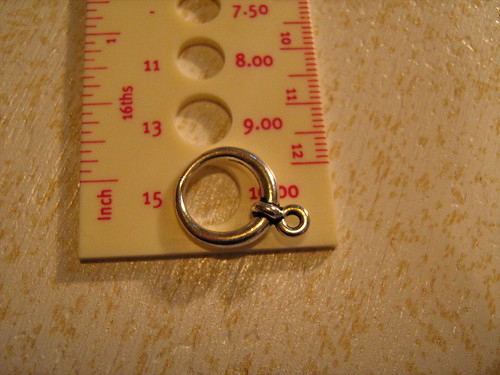
– The circle part of necklace toggle closures (There is a bit of a deprivation of them in my city, I could only find ones that will fit up to US 15 needles. You can get them a lot smaller, though, which would be less bulky)
– Needle-nosed pliers
– Sharp scissors (not your favorite ones, though. You’re going to use them to cut metal.)
I could get all of these things at a dollar store, but I got the beads at a bead shop. They were prettier than the ones available at my local dollar store.
How To Make Them:
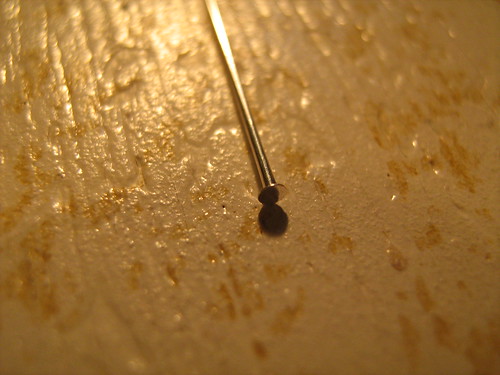
Step one: Bead the Pin
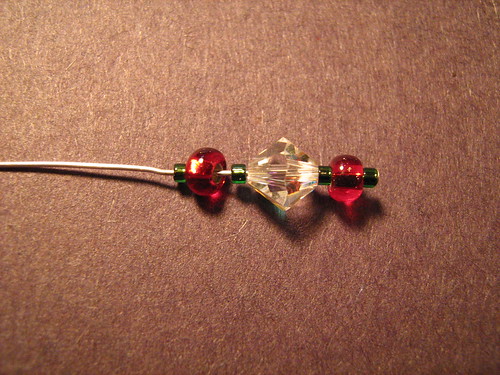 Just as easy as it sounds. One thing though: Start with a small-holed bead. The pin head is not large enough to stop most beads from falling off. The small-holed bead will, and keeps the stitch holder all in on piece! Use whatever pattern you want after that, but just remember that these are going to be sitting on your needles. You don’t want them to be too heavy.
Step 2: Bend the pin and attach to the ring
Using needle nosed pliers, bend the pin a few millimeters above the last bead. You want to end up with a hair-pin-like bend.
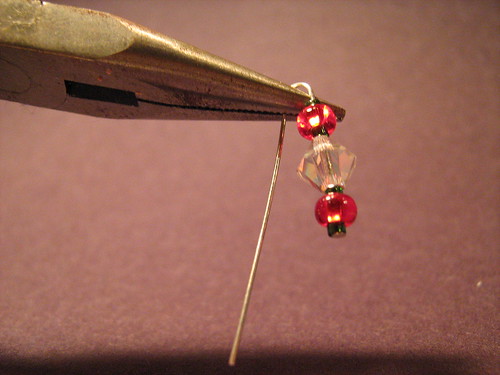

Slip the small ring over and into this bend.

Step 3: Secure the Pin
Wind the pin around itself, using the pliers to pull it tight. Trim the excess off carefully, keeping in mind that the pin-end may fly off when snipped.
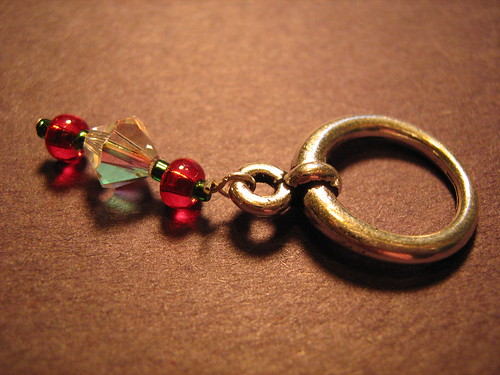
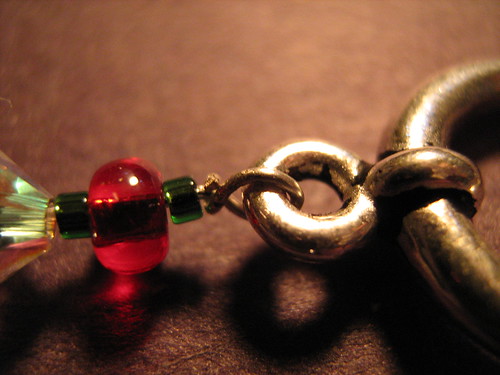
Use the pliers to fold the rest of the pin into itself, squishing it down nice and tight.

Voila! Completed Christmas-y stitch markers!
I like pictures, btw, so if you make some, please let me know! I’d love to see them!


Hi, I was delighted to find your article “Beaded Stitch Markers”. I now have to acquire the equipment to do a project. I have all kinds of beads, but need to find Head Pins. We have a Hobby Lobby and Micheals here in Ohio, hopefully they will have them. I saw these on Ebay that were made of gemstone, glass, silver, pewter and thought it would be great to make my own. Wish me good luck and thank you for the article.
Pingback: Labor Day Laziness « Kkhymn’s Corner
Thanks for this tutorial! I love your stitch markers and always wondered how to make them. I might try it for some holiday gifts this year.
hey, do u know if the circle part of toggle closures comes seperately from the other part??
Hey I made some! Go check out my blog (in a few minutes… haven’t published yet lol!) :)
Thanks so much for this! Going to borrow it for a summer program at my library
I’m going to try this out this weekend. These are exactly the kind of stitch markers I like.
Thanks for posting this.